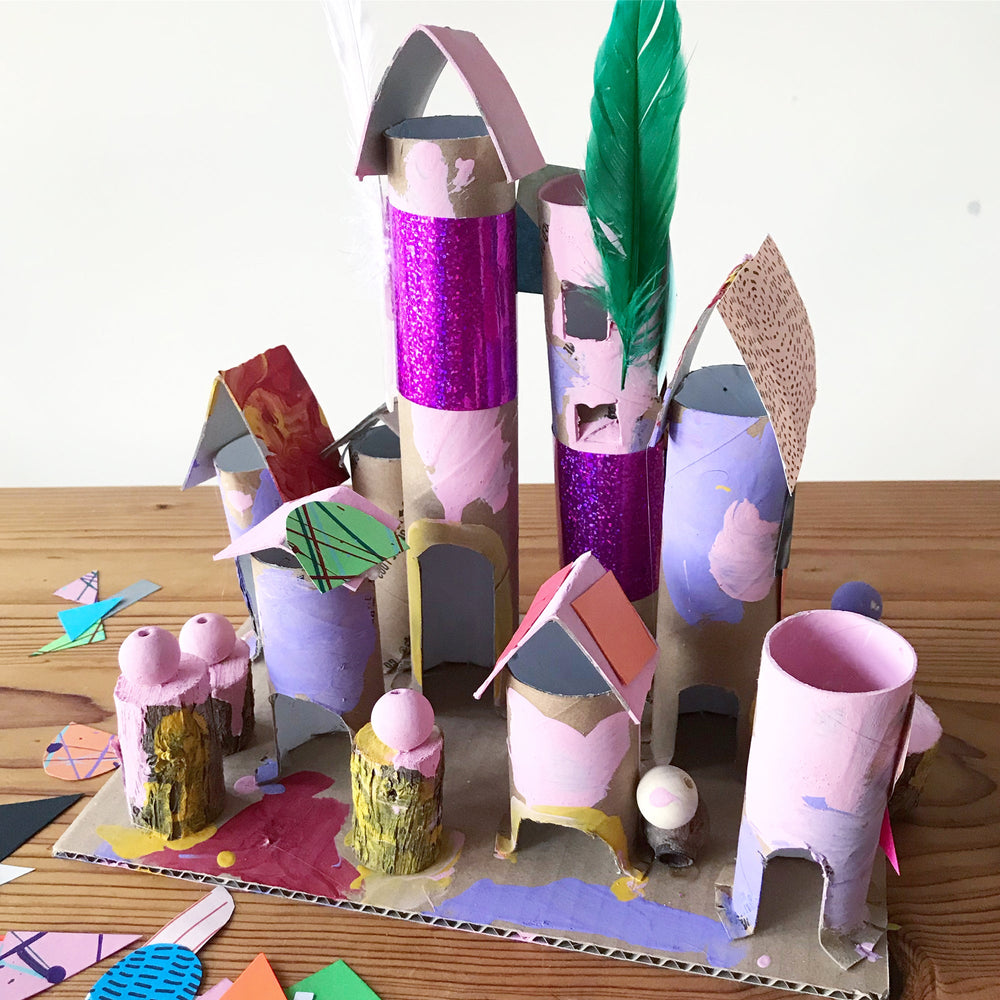
This is one of those projects that just spontaneously happened. We always have a stash of household recycling in a box next to our craft table. My little one found some tubes and decided she wanted to build a fairy castle. I helped her cut a flange around the bottom of a tube and we glued it onto the base. I was then distracted by something else (I think I was cooking dinner), when I returned to the craft table she had cut herself flanges around the bottom of the rest of the tubes and glued them onto the base. She had also added some little doors and windows. I have to admit, I was pretty impressed as she is only 3 years old; she was so proud of her work! The fairy castle then stayed on our craft table for the next few days and she kept adding new elements and decorations.
MATERIALS:
- Cardboard tubes
- Scrap cardboard for the base and the roofs
- Corks or wooden beads (optional)
- Paints
- Scissors
- Hot glue and multi purpose craft glue
- Collage materials to decorate
HOW TO:
Cut a thick piece of cardboard as the base for your fairy castle. Using a selection of different length tubes, cut mini door ways and a flange around the bottom of each tube, then secure your mini fairy castles to the cardboard base using glue. We added roofs to our little houses as well as a few other elements using wooden blocks and beads.

Next job was to decorate the castle using paints. Once the paint had dried, my little one also added other details and decorations using collage materials to complete her fairy castle.

Happy crafting friends!
SHOP OUR FUN & EASY PRINTABLE ACTIVITY SHEETS
Shop our range of awesome printable activity sheets and colouring pages. We have everything your little artist needs to explore famous artists, STEM projects, animals, magical worlds and much more.
See our full ranges of PRINTABLE ACTIVITY SHEETS HERE >>>