This is a fantastic craft project for children age 6+ and adults as well. The weaving process is great for developing fine motor skills. For younger children, I recommend using chunky wool or cord so the weaving grows quickly, otherwise they may loose interest.
MATERIALS:
- Cardboard circle or flower shape
- String
- A selection of yarn, cord or strips of fabric
- Scissors
- Beads (optional)
HOW TO:
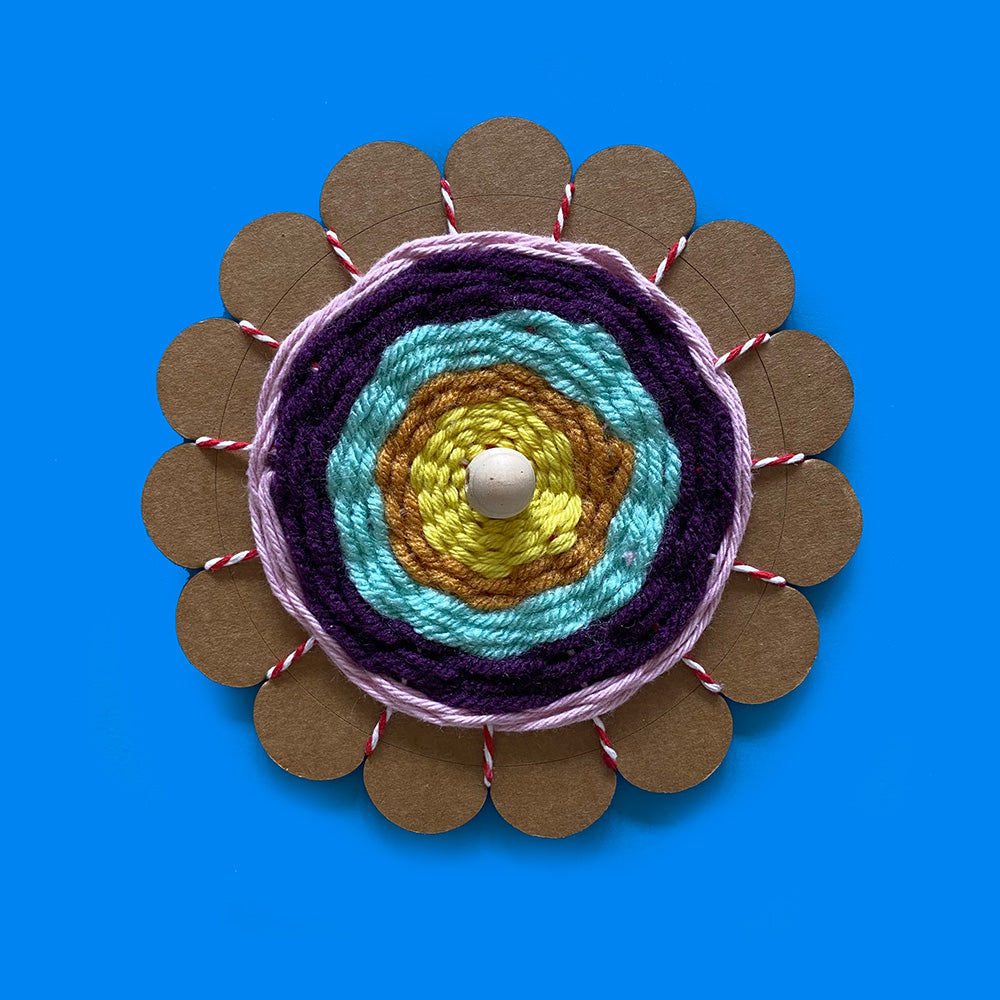
Cut out cardboard circles or flowers with an odd amount of slots around the edge and punch a hole in the middle. I laser cut these flowers. If you don't have a laser cutter (or LOTS of time), cutting a plain circle will be easier!

To create the strings to weave through, secure a string with tape onto the card and wrap around the slots threading it through the middle hole each time. Once you have gone all the way around the circle, secure the end of the string with tape.

To begin weaving, thread a yarn onto a chunky needle and tape the end to the back of the card flower. Thread through the central hole and begin weaving under and over the strings around the circle.

Continue weaving around and around the circle. When you want to change colour, tie on a new yarn and continue weaving tucking the ends of the yarn under the weaving.

Keep adding more colours and continue your weaving. You can even add in beads as decorations.

When you have reached the edge of the circle, to finish your weaving, secure the end of the yarn either under your weaving or on the back of the card flower with tape.

Happy crafting friends!
SHOP OUR FUN & EASY PRINTABLE ACTIVITY SHEETS
Shop our range of awesome printable activity sheets and colouring pages. We have everything your little artist needs to explore famous artists, STEM projects, animals, magical worlds and much more.
See our full ranges of PRINTABLE ACTIVITY SHEETS HERE >>>