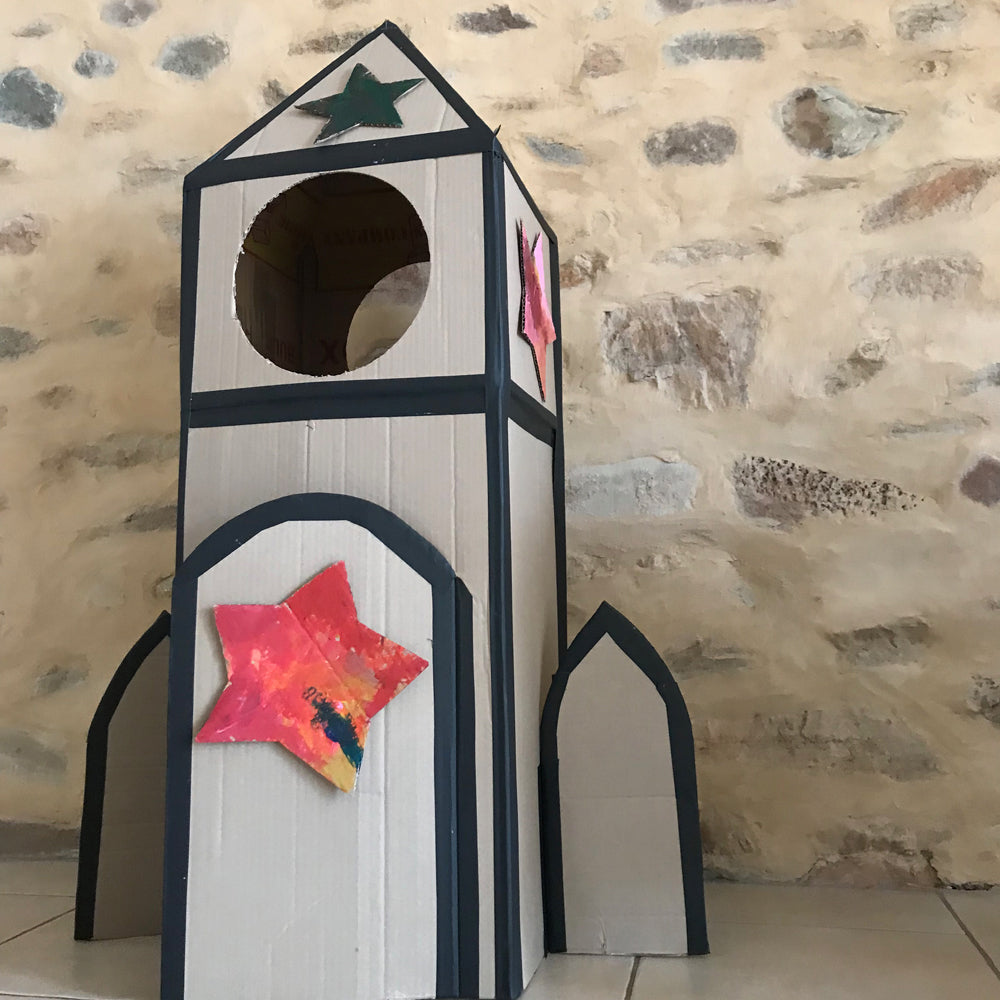
My eldest has always been fascinated by all things space, so after moving house, when we had a lot of large cardboard packing boxes, we decided to build a huge rocket!
MATERIALS:
- 2 large cardboard boxes (ideally the same size)
- Hot glue gun
- Packing tape
- Craft knife
- Paint (optional)
HOW TO:
Flatten out your 2 boxes and cut off the top and bottom flaps leaving a small flap to attach the 2 boxes together. With a craft knife cut out your door shape and windows. In the second box cut the triangle shapes to form the roof. I usually turn my boxes inside out to give a clean canvas for decorating.

Glue and tape the 2 boxes together using the overlapping flaps to join the top and bottom boxes together. Then tape the sides of the boxes together, creating a tall box shape.

Tape the roof together to make the rocket shape. Cut two rocket boosters from cardboard and attach to the sides of your rocket. After making this rocket, I realised it would have been better if i had left the base on the bottom box to make it more secure and stop the rocket from moving about when the kids are inside.

So my little one could join in the project, I cut our some cardboard stars for her to paint as decorations. Now decorate your rocket and fly to the moon!


My kids loved making and playing with this cardboard box rocket so much, that we decided to make a new version and include it in my first kids craft book UNBOXED: Adventures in cardboard. The book full of craft ideas all made with cardboard boxes and household recycling. Each of the project ideas in the book is something that you can make together with your little ones that they can then play with.

Happy crafting friends!
SHOP OUR FUN & EASY PRINTABLE ACTIVITY SHEETS
Shop our range of awesome printable activity sheets and colouring pages. We have everything your little artist needs to explore famous artists, STEM projects, animals, magical worlds and much more.
See our full ranges of PRINTABLE ACTIVITY SHEETS HERE >>>