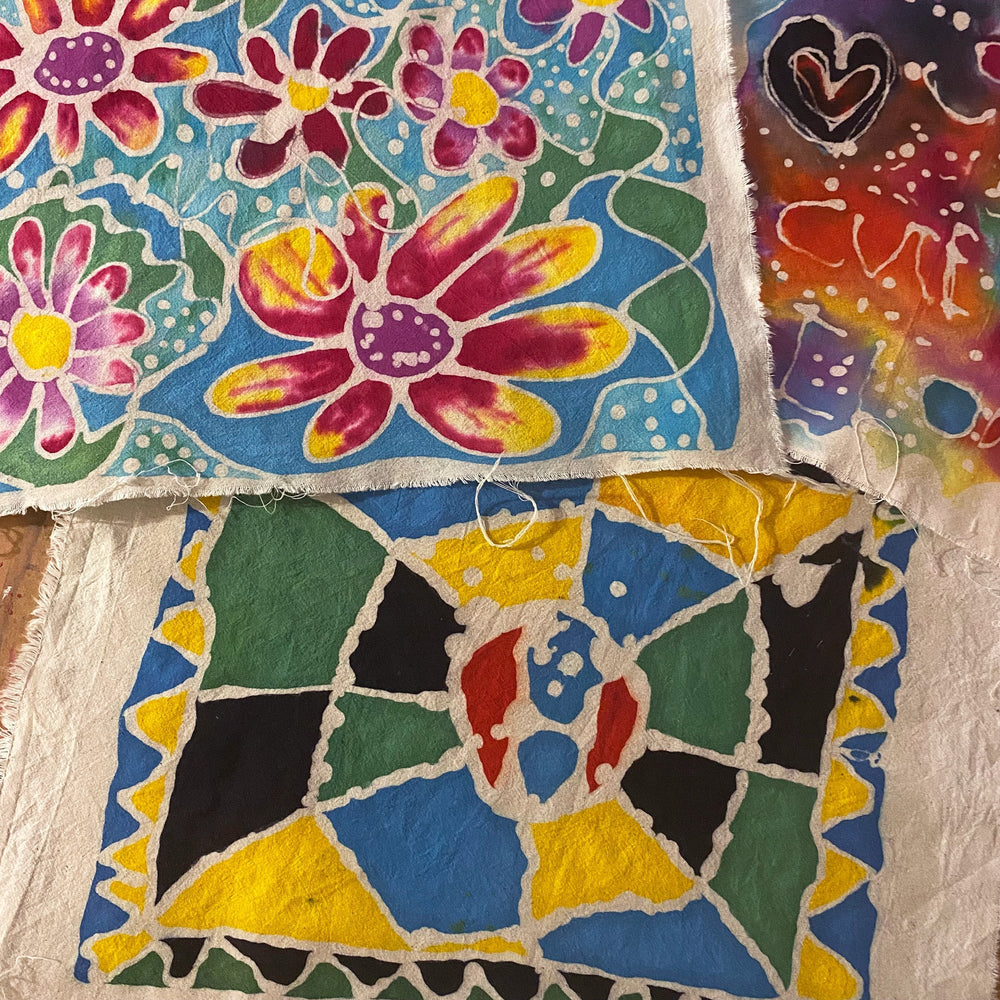
Over the last few weeks we have been exploring batik. I was gifted some old tjanting batik tools from my mother-in-law and have been wanting to try them out for a long time. This week we finally got around to buying some wax, dyes and a heating pot, and giving it a go. Exploring the process with my kids has been so much fun. Initially I was hesitant about using hot wax with my children (they are 7 and 10), but it is actually very easy, safe and achievable.
For those with younger children, or without access to batik equipment, you can create a similar effect using PVA glue and acrylic paints or fabric dyes. I will share both techniques in the article below.
TRADITIONAL BATIK WITH WAX
MATERIALS:
- Batik wax - we used a mix of bees wax and paraffin wax
- Tjanting tools
- A heating pot
- Cotton fabric
- Fabric dyes and soda ash
- Brushes
- Baking paper
- Masking tape
- A fabric rag or paper towel
- Absorbent paper
- Iron
- Hot soapy water
I purchased all our fabric dyes, wax and the heating pot for a specialist batik supply store.
HOW TO:
If the fabric you are using is new, wash it first to remove any dressing on the fabric. This will allow the dye to penetrate better. Once dry, iron the fabric and cut into the desired size for your batik artwork.
Cut a sheet of baking paper to the same size as your fabric, place it under the fabric and tape both to your work surface using masking tape. Make sure your fabric is flat and pulled taught across the table surface. When you add the wax, the baking paper will prevent the fabric from sticking to the table or work surface.
Whilst you are setting up the fabric, turn on your heating pot to melt the wax. Once the wax is hot, place your tjanting tools into the pot allowing the metal part to heat up. Having the tools hot is important, otherwise the wax will harden quickly and clog the spout when you are trying to work.
Once the wax is hot and your fabric is set up, you are ready to start making your design. Holding a tjanging tool in one hand and a cloth or paper towel in the other hand, fill the tjanging with wax and carefully lift out of the pot. Place the cloth under the tjanging spout as you bring it to your fabric to prevent dripping. Use the tools to 'draw' a design on your fabric with wax. When you put the wax onto the fabric, it should soak into the fibers and look translucent. If the wax is sitting on the surface of the fabric and looking opaque, it's not hot enough. Return the wax and tool to the pot and allow to heat up more.
Please follow the instructions for your wax and pot and don't let them overheat.

Don't worry about and mistakes or splashes of wax, these will add to the character of your artwork!
When you have finished creating your wax design, let the wax harden before adding colour. Mix your fabric dye with soda ash and water in the proportions directed in the dye instructions. We then used brushes to paint the dyes onto different sections of our wax designs. As you paint the dyes on, they will look much darker than the final colour. When you wash them out, the colour lightens.


When you have finished painting, let your fabric dry and cure for 24 hours before washing.
After 24 hours, before washing, you need to remove the wax. Place the fabric in-between multiple layers of absorbent paper. News paper, butchers paper or paper towel will work. Iron on top of the paper. This will melt the wax and it will be absorbed by the paper. Once you have removed as much wax as possible using this technique, it's time to wash.
First rinse the fabric in cold water to remove excess dye. Then submerge the fabric in hot soapy water and agitate. Wash and rub the fabric removing as much wax as possible, more dye will come out during this stage. Finally rinse in hot water to remove the soap and hang out to dry.
Once the fabric is dry, give it an iron and your batik artwork is complete.

PVA GLUE BATIK
This technique gives a fun batik-like effect but with a little less detail. It's great for younger children or if you don't have access to expensive batik equipment.

MATERIALS:
- PVA glue in a squeezy container with a small spout
- Cotton fabric
- Baking paper
- Masking tape
- Fabric dyes and soda ash or acrylic paints
- Hot soapy water
HOW TO:
If the fabric you are using is new, wash it first to remove any dressing on the fabric. This will allow the dye or paint to penetrate the fabric better. Once dry, iron the fabric and cut into the desired size for your artwork.
Place a sheet of baking paper under the fabric and tape the fabric to the table.
To create your design, squeeze the PVA glue onto the fabric in lines creating a drawing or pattern. Use a squeezy container with a small spout to get more detail.

Leave the glue to dry until hard.
Now it's time to add colour. Paint the sections of your design with fabric dye or acrylic paint. If you are using dye, let it cure for 24 hours before washing off.

To wash off the glue and excess dye or paint, submerge the fabric in hot water. Agitate and rub until all the glue has been removed. You can tell when the glue is washed out when the fabric stops feeling slimy.

Hang your batik artwork to dry. Once dry, give the fabric an iron.
Happy crafting friends!
SHOP OUR FUN & EASY PRINTABLE ACTIVITY SHEETS
Shop our range of awesome printable activity sheets and colouring pages. We have everything your little artist needs to explore famous artists, STEM projects, animals, magical worlds and much more.
See our full ranges of PRINTABLE ACTIVITY SHEETS HERE >>>